Help — iPad

OmniSketch
Procedural sketching for iPad
Draw something beautiful in 60 seconds — no talent required. Every OmniSketch brush is procedural: it builds its own art as you move, so one finger and one minute are enough. You can reopen this guide any time from the ? button in the gallery.
Canvas toolbar






The canvas
One finger always draws. Pinch with two fingers to zoom, drag with two to pan, and double-tap with two fingers to fit the whole canvas on screen. Three-finger tap hides or shows the toolbar. Apple Pencil pressure and tilt shape the stroke.
Canvas size. A new sketch starts at your iPad's screen size. Tap the size chip on a fresh canvas to choose Square 2048, Story 1080×1920 or Print 3840 — larger canvases are part of Premium, and each size shows how many layers your iPad supports at that size.
Brushes & color
Choosing a brush. Tap the brush button to open the panel, then pick from the Standard and Geometry packs (24 classic brushes each) or the Next‑Gen pack — Silk, Ember and Chrome, powered by a new Metal engine. Every brush is procedural: it builds its own texture as you draw, so moving slowly or quickly changes the result. Watch the preview — the stroke speeds up and slows down to show both sides of each brush.
Color. In the brush panel, tap the color well for the system color picker (grid, spectrum, sliders and an eyedropper). The preview and the toolbar's color dot update live.
Size, opacity & detail. The sliders in the brush panel tune the stroke. "Detail" only appears for brushes that support it.
Locked brushes show a small lock — tap one to see what OmniSketch Premium adds.
Blend modes
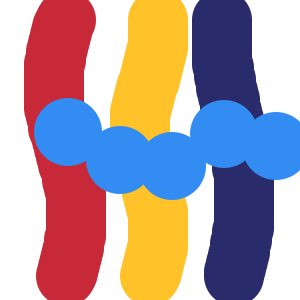
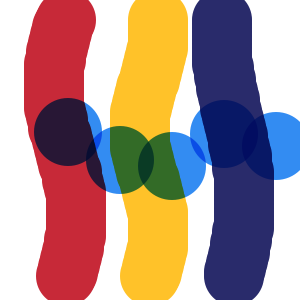
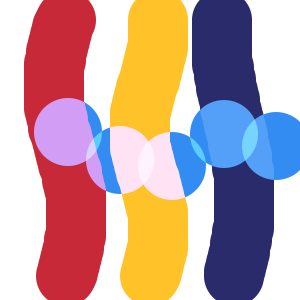
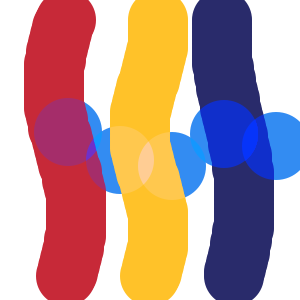
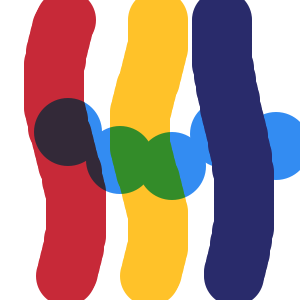
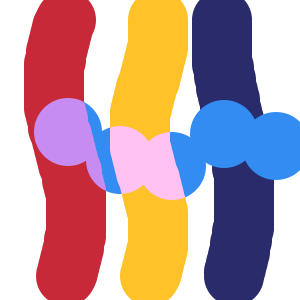
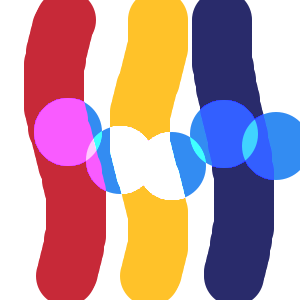
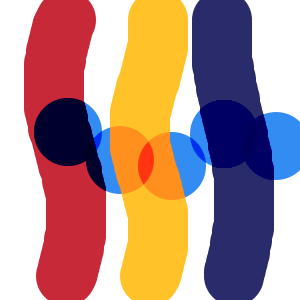
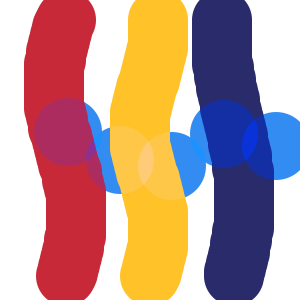
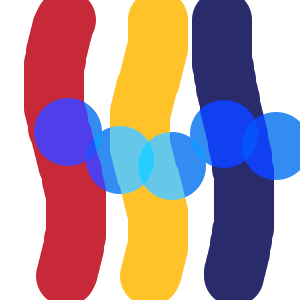
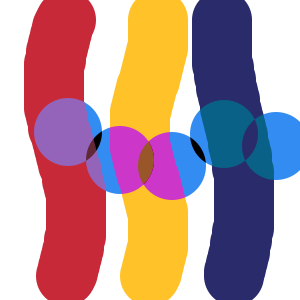
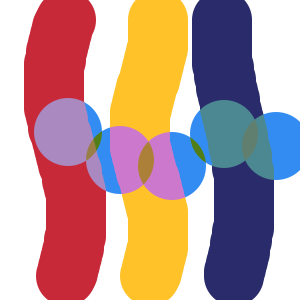
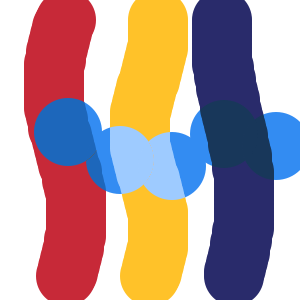
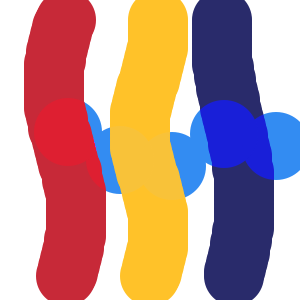
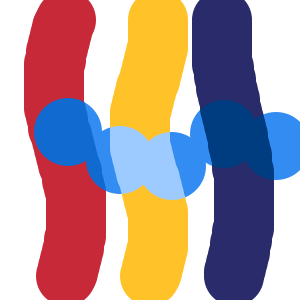
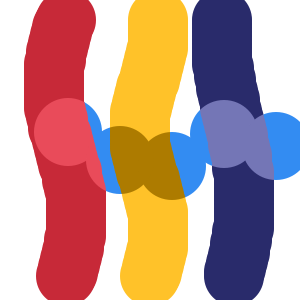
A blend mode changes how new strokes mix with the ink already on the layer. Below, the same azure stroke is drawn over the same art in every picture — only the blend mode changes. One more thing worth knowing: OmniSketch brushes lay down many overlapping marks, so in a blend mode a stroke also blends with itself where it overlaps — drawing slowly deepens the effect. That's not a bug, it's a technique.
Layers
Build your sketch up in layers. Tap a layer to draw on it — the highlighted row is the one your strokes land on. Drag a row to reorder. Free sketches use up to 3 layers; Premium unlocks the most your iPad supports for the canvas size.
On each layer


Along the bottom




The gallery
Your sketches, newest first. Tap one to keep drawing. Long-press for everything else: Duplicate, Rename, Rotate, Sketch Info, Save to Photos, Share, Expand to a 2× canvas, Move to Folder, and Delete.


Share & export
Share… sends your sketch as an image — standard size, or High Resolution (2×) with Premium: OmniSketch redraws every stroke at double resolution, so it's genuinely sharper, not just bigger. Layered PSD exports your layers — names, order and opacity — for Procreate, Photoshop or Affinity.
Share Sketch File sends the sketch itself — a single .omnisketch file, drawing history and all — which opens right up in OmniSketch on another iPad.
Save to Photos drops the image straight into your photo library. Everything you share or save carries your sketch's name; untitled sketches get a tidy "OmniSketch" date stamp.
Expand to 2× Canvas redraws a sketch onto a canvas twice the size — procedural brushes mean it's redrawn, not stretched.
Bringing art in
OmniSketch opens images (PNG, JPEG, HEIC), layered Photoshop files (PSD), OpenRaster files and .omnisketch files. Use "Copy to OmniSketch" in another app's share sheet, or open straight from the Files app. PSD layers keep their names, order and opacity wherever possible — if something exotic has to be flattened or converted, OmniSketch tells you exactly what changed. Then draw right on top.
Home-screen widget
Add the Recent Art widget (small or large) to your home screen and your latest sketch lives there. Tap it to open that sketch right in OmniSketch. On iOS 17 and later, long-press the widget and choose "Edit Widget" to show one particular sketch instead, or a rotating slideshow of your whole gallery or a single folder, at the pace you choose.